Here’s an interesting extension to an existing feature: custom highlighting.
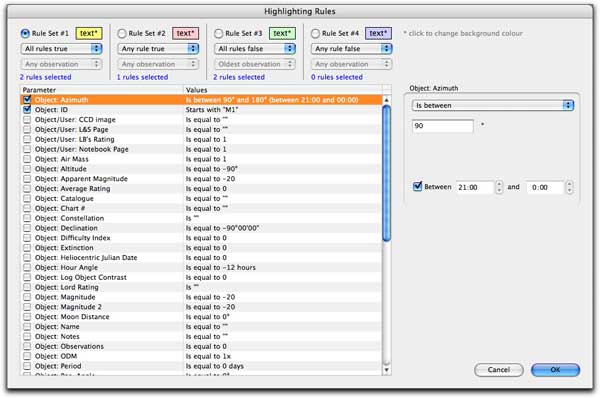
If you choose custom highlighting from the Highlighting popup, you get a completely different dialog from the V1 case.

The first thing you’ll notice along the top is that you now have four independent sets of rules to choose from (rather than one), each with its own colour. In the above picture, Rule Set #1 is chosen. There are rules for virtually every possible object and observation field. On the right is the setup field for the selected rule (and the sharp eyed will already notice a bug).
You can select that highlighting is true if all (checked) rules are true, as before. You can also select if any rules are true, etc. Similarly for rules involving observations.
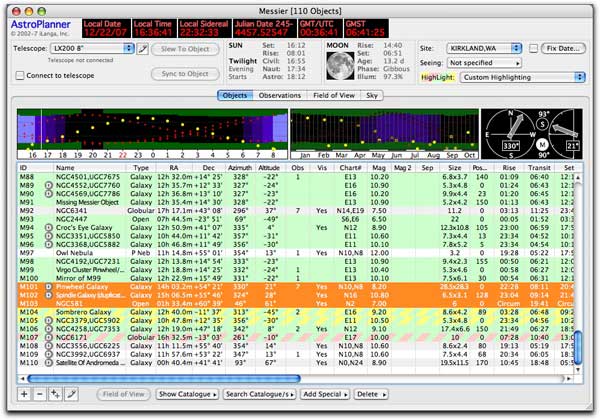
So of course, you’re now wondering what will happen if two (or more) rule sets are true for a particular object. All is revealed below.

Pretty cool huh? You now have the ability to make your plan document look like a Wall Street traders computer.
Bonus: you’ll also note that three object lines have been selected (in orange) with the cursor. Yes, multiple (and non-contiguous) selection is now possible on the object list. You’ll see that the rise/transit/set graphic contains all three objects. I’m still debating whether or not to allow this, since if you select, say, 20 objects it can slow things down quite a bit.
Interestingly, highlighting was originally mooted in V1 to get around the fact that you couldn’t do multiple selection. That point is now moot. There, I managed to use “moot” twice, no three times, in one paragraph.