Introducing AstroAid V2. Yes, the version number has been bumped because the changes are many, and the app looks quite different. Let’s look at what’s new and changed. I will illustrate the iPad version, but the iPhone version has all the same features – just in a somewhat different interface.
I will be handing the finished app to Apple for approval in the next day, so it should be available for download in a week or so.

Camera lenses
What used to be called “Telescopes” is now called “Instruments”. The reason for this is that you can now select from the (previously-available) list of telescopes, or a new list of camera lenses (which can be used as “telescopes”, especially when imaging).
Clicking the Instrument graphic lets you select either telescopes or lenses using the tab bar at the bottom. As before you can create your own custom entries if your item isn’t on the built-in list.
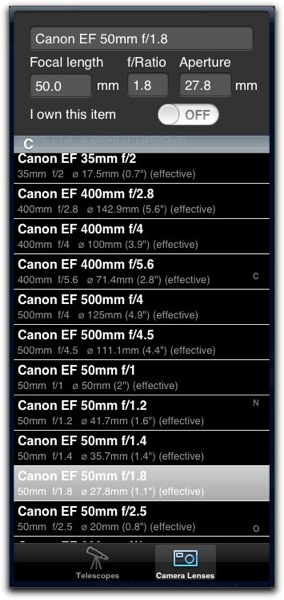
You’ll note that the “spinning barrel” method of choosing an entry has been replaced throughout the app with a list. The list method allows a lot more items to be displayed, with additional information. It’s also a lot faster to navigate. See below for more info about this.
Imagers
As well as the previously-available eyepieces, you can now choose  to put an imager/camera on your telescope and see the effects.
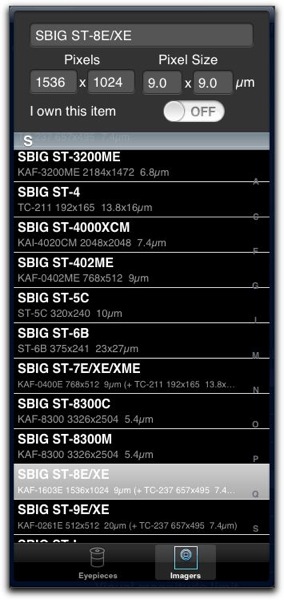
Choosing an imager changes the field of view display (see below). The Parameters table changes to show various imager-related items, such as pixel scale, etc. You’ll note in the image above that there’s a convenient “index” running down the right side of the list. This allows you to jump to different parts of the table rapidly (e.g. if you have a Canon camera, tap the “C” in the index). Most of the lists in the app now have this index.
Field of View
The field of view graphic is pretty much unchanged for telescopes used with eyepieces, except that the centre of the field of view now has small red cross hairs, initially centered on the object coordinates. Additionally you can use your finger to drag the background image around (noting that the images are all 1° by 1°, so dragging any further than the edge of the image will just show black).
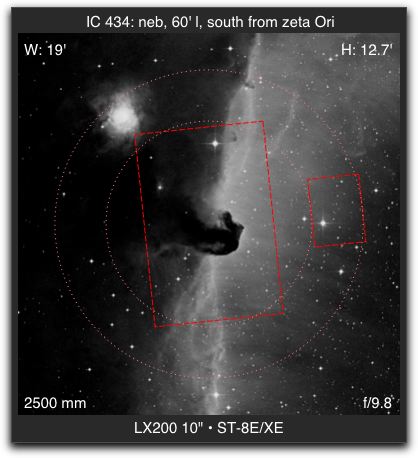
With imagers, the circular aperture and cross hairs go away, and the outline of the imager’s field of view is superimposed on the background image. If the imager has a built-in guide sensor defined (some SBIG imagers), that will also be shown (see below), together with the track traced out by the guide sensor (to help locating suitable stars for guiding).

As well as being able to move the background image with a finder, by dragging, you can also rotate the imager field of view by using a twisting motion with two fingers (as illustrated below). This should help with deciding framing issues.
Objects
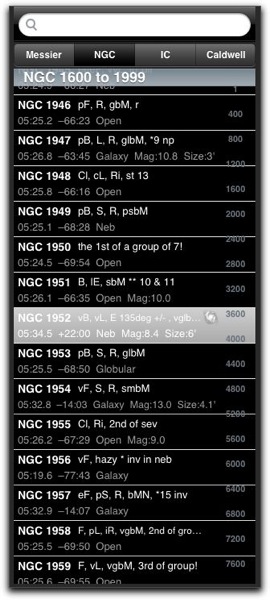
As well as the previously-available Messier catalogue, the full NGC, IC and Caldwell catalogues are included for this version. You can select the catalogues using the bar just above the list. The index on the right of the list helps with navigation.
Downloading Images
Only the Messier catalogue includes built-in 1° by 1° images as before. Images are available for all the other catalogues, but must be downloaded over the Internet. This happens automatically by default. The images are cached on your iPad/iPhone, so if you download the ones you need before you go out into the field, they’ll be there when Internet access isn’t.
The images are all custom-optimised and fairly small (they vary from 0.2 to 1.2 MB each, averaging around 0.4MB). They typically take a second or two to download. When the field of view wants an image, it first checks what’s available locally, and if it’s not available, it will be downloaded as required.
Search
You can search the currently-selected catalogue by typing a search phrase into the search field above the object list. It will search the ID, description and type fields, and find the next object that matches. e.g. “NGC 1234” will find the NGC1234 entry, “Glob” will find the next globular cluster, etc.
Object Settings
The button above the object list with the “gear” in it lets you choose some settings for downloading and searching.
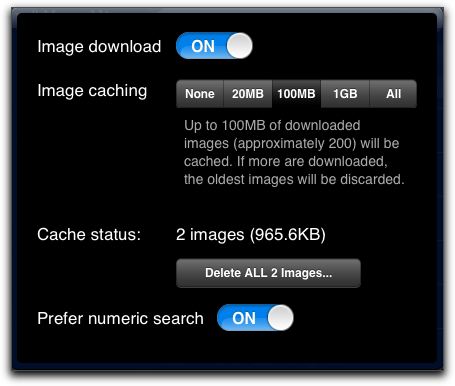
You can specify whether downloading is required (in case you have 3G but not WiFi connectivity and want to avoid draining your expensive 3G data quota).
You can also specify how much space should be allocated to saving images (the default is 100MB) in case you are strapped for space on your device. You can also elect to delete all of the downloaded image if needs be.
When searching, if you primarily search for particular ID numbers, then you can preferentially have the keyboard appear in numeric mode by default.
Night Vision
The “moon” button on the main screen puts the app into “night vision” mode and effectively covers the entire screen with a sheet of virtual red plexiglass. Tapping the button again puts you back in daylight mode.

Â
Â